In the early 2000s, game development was a thrilling frontier, and Unreal Editor 2.0 (UE2) was one of the most exciting tools available for both hobbyists and professional developers. Part of the Unreal Engine 2 ecosystem, UE2 allowed designers to create complex 3D environments, craft gameplay mechanics, and bring immersive worlds to life—without needing to reinvent the engine from scratch.


What is Unreal Editor 2.0?
Unreal Editor 2.0 is a level and game editor for Unreal Engine 2, released alongside games like Unreal Tournament 2003 and Unreal Championship. It offered a WYSIWYG (What You See Is What You Get) interface for building levels, scripting events, and placing actors. It was designed to give both novice and experienced developers a hands-on way to manipulate game worlds.
Key Features
- Visual Level Design
Designers could build environments using brushes, textures, and static meshes. The editor supported complex geometry, lighting, and terrain, making levels feel alive and interactive. - Kismet Scripting (Early UnrealScript Integration)
Developers could script game events, triggers, and AI behavior using UnrealScript, giving levels interactivity beyond static maps. - Material and Lighting Control
UE2 allowed precise control over textures, materials, and lighting. Dynamic lighting, volumetric fog, and particle effects brought environments to life. - Actor Placement and Customization
Objects, enemies, weapons, and pickups—collectively called “actors”—could be placed and customized directly in the editor. This gave designers flexibility to tweak gameplay without touching engine code. - Testing and Play-in-Editor
One of UE2’s most powerful features was the ability to play the level directly in the editor, allowing instant feedback on gameplay, navigation, and visuals.
Getting Started with UE2
Back then, jumping into Unreal Editor 2.0 was an adventure:
- Install the Editor
Typically packaged with Unreal Engine 2 or games like UT2003, installation involved copying the editor to your PC and ensuring your graphics drivers supported DirectX 8. - Create a New Map
Open the editor, select “New Map,” and choose your level type (interior, exterior, or combined). - Build Geometry
Using brushes, designers could create rooms, corridors, and landscapes. Boolean operations allowed complex shapes without external 3D modeling tools. - Add Actors and Gameplay
Place enemies, weapons, triggers, and pickups. Adjust properties to customize behavior. - Test the Level
Hit the “Play” button to explore the level in real-time, tweak issues, and optimize performance.
Why Unreal Editor 2.0 Was Revolutionary
Before UE2, building 3D game worlds often required custom tools or deep programming knowledge. Unreal Editor 2.0 democratized level design:
- Hobbyists could create impressive maps without writing engine code.
- Modding communities flourished, producing custom maps, weapons, and game modes.
- It set the stage for modern engines, where visual editors and scripting tools are standard.
Legacy
Unreal Editor 2.0 paved the way for today’s Unreal Engine editors, from UE3 to the latest UE5, with real-time lighting, blueprint scripting, and photorealistic rendering. Many modders and developers started their journey here, learning the fundamentals of 3D game design long before high-end engines became mainstream.
Beginner’s Guide to Unreal Editor 2.0: Crafting Your First Level
Unreal Editor 2.0 (UE2) was the go-to tool for game designers and modders in the early 2000s. Whether you were creating maps for Unreal Tournament 2003 or experimenting with Unreal Engine 2, UE2 let you build, test, and tweak 3D worlds without writing a single line of engine code. Here’s a step-by-step guide to get you started.
Step 1: Install and Launch UE2
- Install the Editor
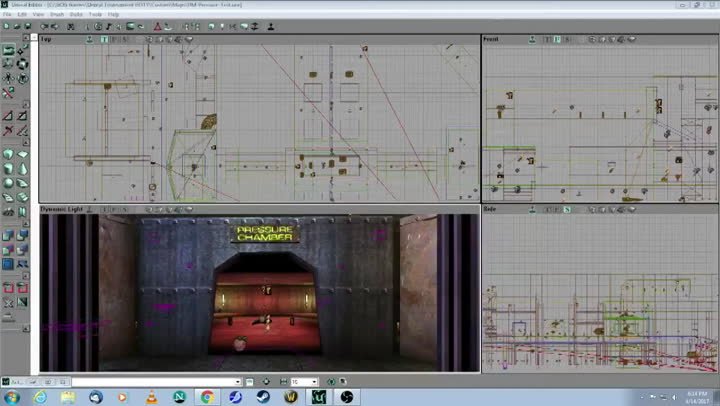
Unreal Editor 2.0 usually came with UE2 games like UT2003. Run the installer and choose the editor components. - Launch the Editor
Once installed, runUnrealEd.exe. You’ll see the classic multi-window interface: the 3D viewport, Top/Side/Front viewports, the Actor Browser, and the Properties Panel.
Step 2: Create Your First Map
- Click File → New Map.
- Choose your environment type (interior, exterior, or combined). For beginners, start with a simple interior room.
- Name your map something memorable, e.g.,
MyFirstMap.ut2.
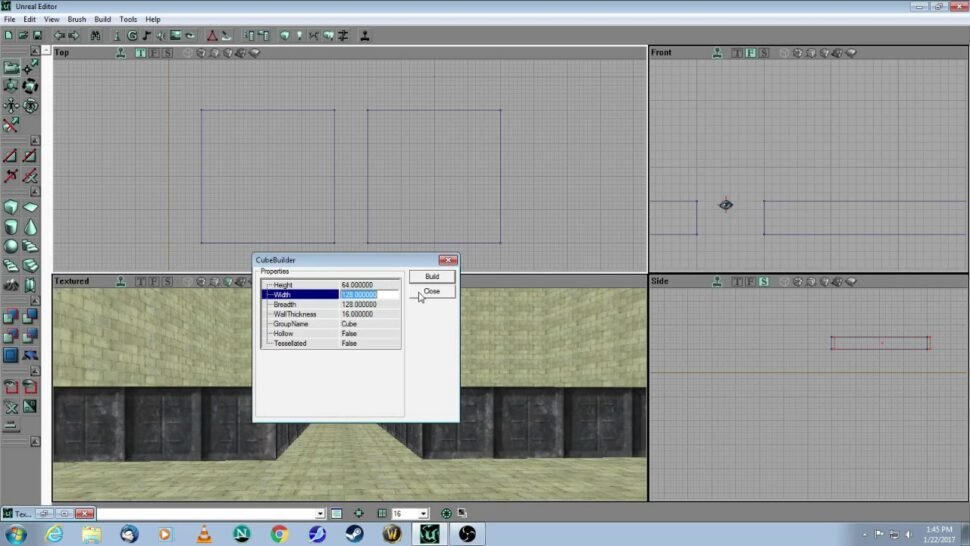
Step 3: Build the Level Geometry
- Select a Brush from the left toolbar (Cube, Cylinder, or custom shape).
- Drag in the 3D viewport to create walls, floors, and ceilings.
- Use Boolean operations (Add, Subtract, Intersect) to create complex shapes. For example, subtract a cylinder from a cube to make a doorway.
Pro Tip: Press G to toggle the grid; it helps with precise placement.
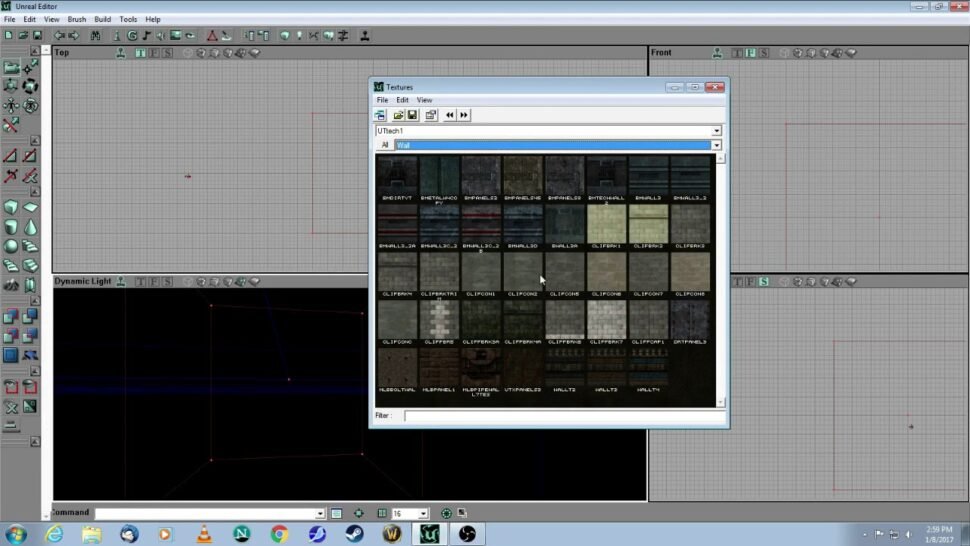
Step 4: Add Materials and Lighting
- Open the Material Browser and pick textures for walls, floors, and ceilings.
- Drag and drop materials onto your brushes.
- Add light actors (PointLight, DirectionalLight) to illuminate your level.
- Hit Build → Build All to generate lighting and textures for a realistic look.
Pro Tip: Start with static lights before experimenting with dynamic lighting; it’s faster and less buggy on older hardware.
Step 5: Place Actors and Gameplay Elements
- Open the Actor Browser and select objects like:
- Weapons (Rocket Launcher, Flak Cannon)
- Pickups (Health, Armor)
- Enemies (bots or custom pawns)
- Triggers (doors, lifts, or scripted events)
- Drag actors into the viewport and adjust their properties (health amount, AI behavior, etc.).
Step 6: Test Your Level
- Click Play in the editor to explore the level in real-time.
- Walk around, test weapons, and interact with triggers.
- Make notes of areas that need tweaking (lighting, scale, or gameplay flow).
Pro Tip: Save iterations of your map as MyFirstMap_v1.ut2, v2, etc., so you can always revert changes.
Step 7: Save and Package
- Save your map often using File → Save.
- When ready to share, compile the map using the Build All option.
- Package it for distribution in the
Mapsfolder of your UT2003/UE2 game.

Extra Tips for Beginners
- Keep levels simple at first—focus on layout before adding complex textures or actors.
- Experiment with triggers to create interactive doors, lifts, and puzzles.
- Join modding forums from the early 2000s (or archives online today) to see how other UE2 users built their maps.
- Use snap to grid to avoid floating or misaligned geometry.
Conclusion:
Unreal Editor 2.0 was an incredible tool for aspiring game designers. It combined visual level design, scripting, and real-time testing in a way that made game development accessible—even on early 2000s PCs. By following these steps, you can create your first fully playable map and begin your journey into the world of Unreal Engine.
